Winter can be tough on outdoor structures, especially in regions that experience heavy snowfall and...
Read more
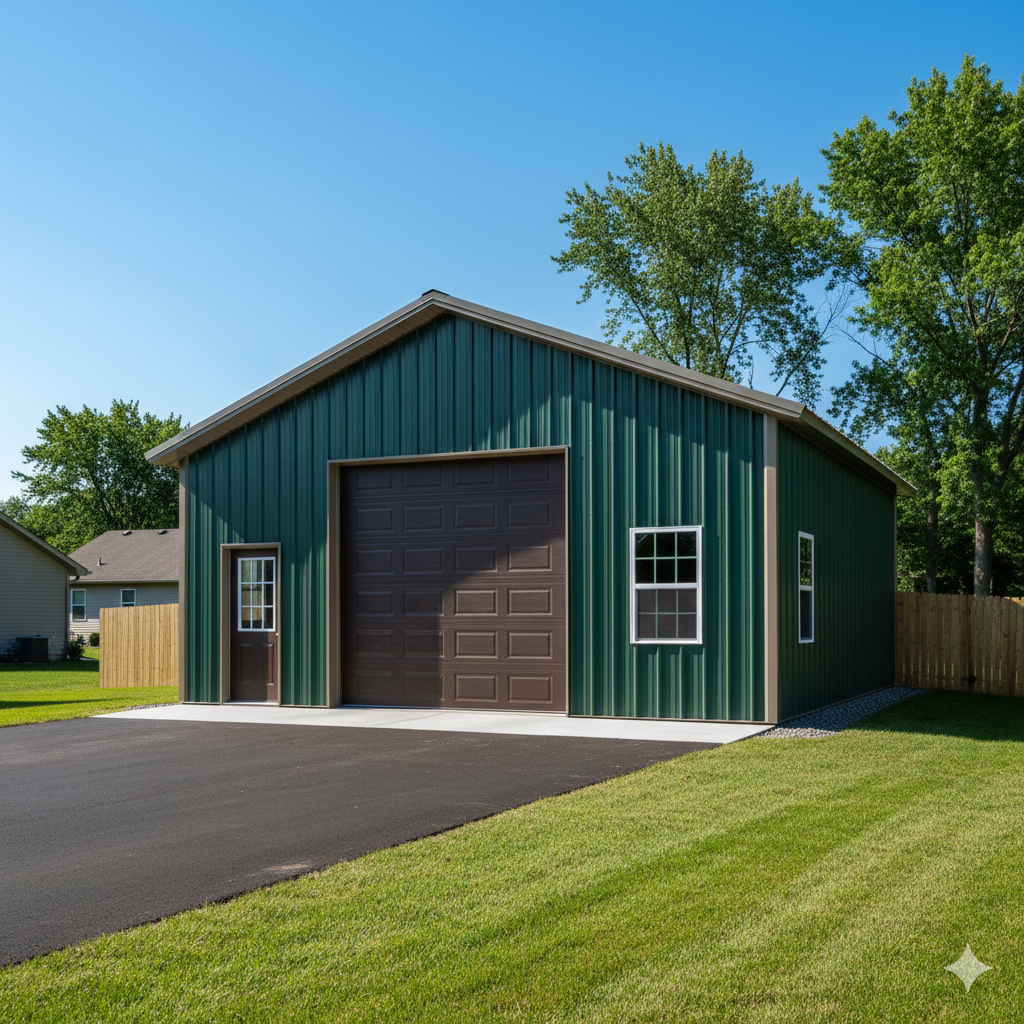
Building a metal garage from a kit is a practical and rewarding project. These kits come with everything you need to construct a sturdy and durable garage. In this step-by-step guide, we’ll walk you through the process from start to finish, so you can confidently build your metal garage.
Size and Design: Determine the size and design of the garage that fits your needs. Consider what you’ll store in the garage and any additional space requirements.
Customization Options: Look for kits that offer customization options like windows, doors, and insulation.
Check Local Regulations: Before starting, check with your local building authority to find out if you need any permits. Obtain all necessary permits to ensure your project complies with local codes.
Select a Location: Choose a level spot for your garage. Clear the area of any debris, rocks, or vegetation.
Foundation: Decide on the type of foundation you’ll use. Common options include concrete slabs, gravel bases, or even dirt for temporary structures.
Inventory: Make sure all parts listed in the kit’s inventory are present. This typically includes panels, frames, bolts, nuts, and instructions.
Mark the Area: Use stakes and string to outline the foundation.
Excavate and Level: Excavate the area if necessary and make sure it is level.
Pour Concrete (if applicable): If you’re using a concrete slab, pour and smooth the concrete. Allow it to cure completely before proceeding.
Position the Base Rails: Lay out the base rails according to the kit instructions. These will serve as the foundation of your frame.
Anchor the Rails: Secure the base rails to the foundation using anchor bolts.
Vertical Supports: Attach the vertical supports to the base rails. Ensure they are plumb (perfectly vertical) using a level.
Top Rails: Connect the top rails to the vertical supports to complete the basic frame structure.
Starting Point: Begin at one corner and work your way around. Attach each panel to the frame using the provided screws or bolts.
Check Alignment: Ensure each panel is properly aligned and securely fastened before moving to the next.
Safety First: Use ladders or scaffolding safely to reach the roof area.
Overlap Panels: Overlap the roof panels as specified in the instructions to ensure a watertight seal. Fasten them securely to the frame.
Positioning: Place the doors in their designated locations. Secure them to the frame with hinges and screws.
Check Operation: Make sure the doors open and close smoothly.
Cut Openings (if necessary): If your kit includes windows but the panels aren’t pre-cut, carefully cut the openings.
Secure Windows: Install the windows according to the manufacturer’s instructions, ensuring they are properly sealed to prevent leaks.
Weatherproofing: Apply sealant around all joints and seams to ensure the garage is weatherproof.
Insulation: If you opted for insulation, install it now to help regulate the temperature inside the garage.
Organize: Set up shelving, hooks, and storage solutions to keep your garage organized.
Electrical Work: If you plan to have electricity in your garage, hire a licensed electrician to handle the wiring and installation of lights and outlets.
Double-Check Everything: Go through each step and make sure everything is securely fastened and properly aligned.
Safety Inspection: Ensure all safety features are in place and that the structure is stable.
Inspection: If required, have your local building authority inspect the completed garage to ensure it meets all codes and regulations.
Building a metal garage from a kit is a straightforward and rewarding project that provides you with a durable and functional space. By following these steps, you can confidently construct a garage that meets your needs and stands the test of time. Enjoy your new space!
____________________________________________________________________________________________________________________________________
Discover exciting categories. Find what you're looking for.